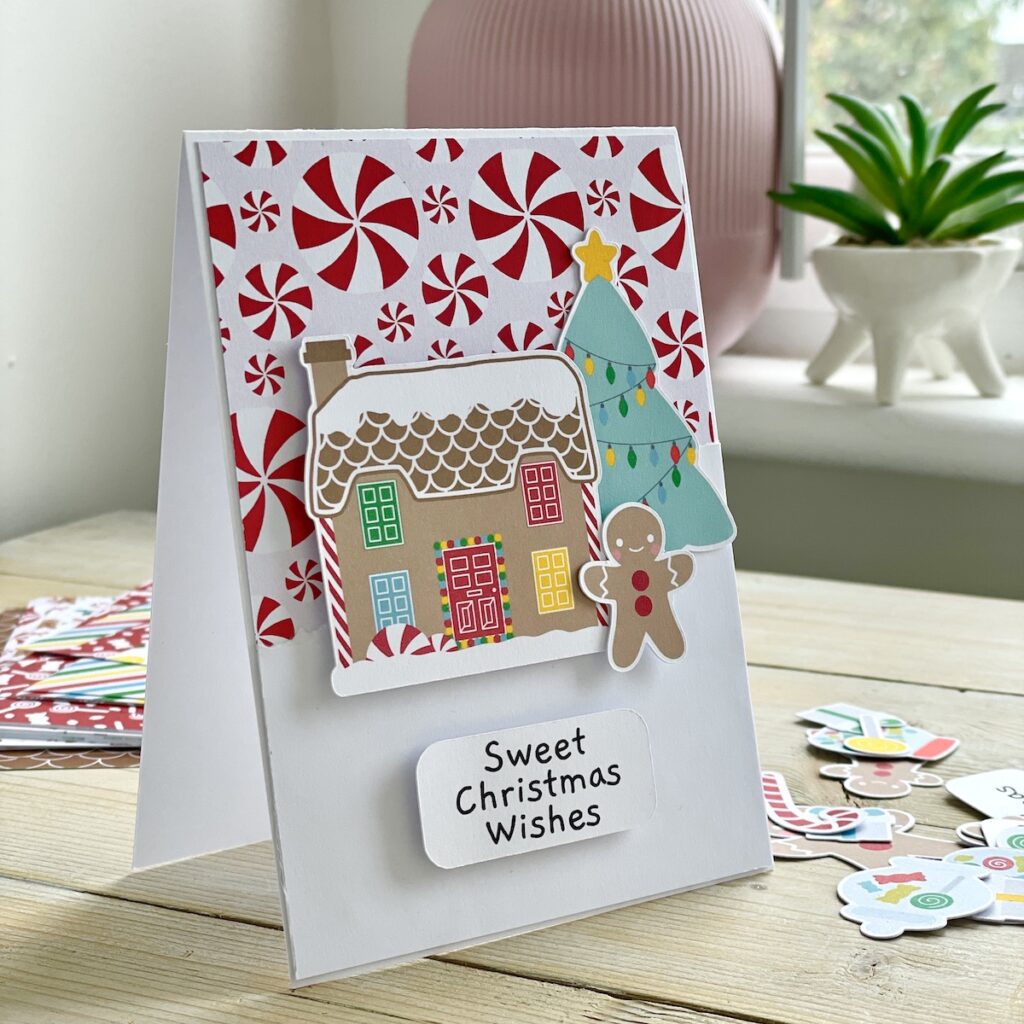
Gingerbread house card
If you’re looking for a way to create quick and simple Christmas cards that take just a few minutes then our new Gingerbread Christmas mini papercraft bundle is perfect for you! Create this cute and simple gingerbread house card with candy swirl background in just 5 minutes.
HOW TO MAKE
1. Create a tent fold card blank from white cardstock.
2. Cover the front with a panel of candy swirl paper.
3. Trim a piece of white cardstock to fit the front and tear to create a rising jagged edge that looks like a snowdrift.
4. Glue the snow panel to the card and add a Christmas tree from the ephemera pack to the right hand side.
5. Use adhesive foam pads to attach the gingerbread house, sentiment and mini gingerbread man.
This design is great for making batches of cards. You can vary the scene each time to include just Christmas trees, just gingerbread men or displays of sweetie jars and lollipops.
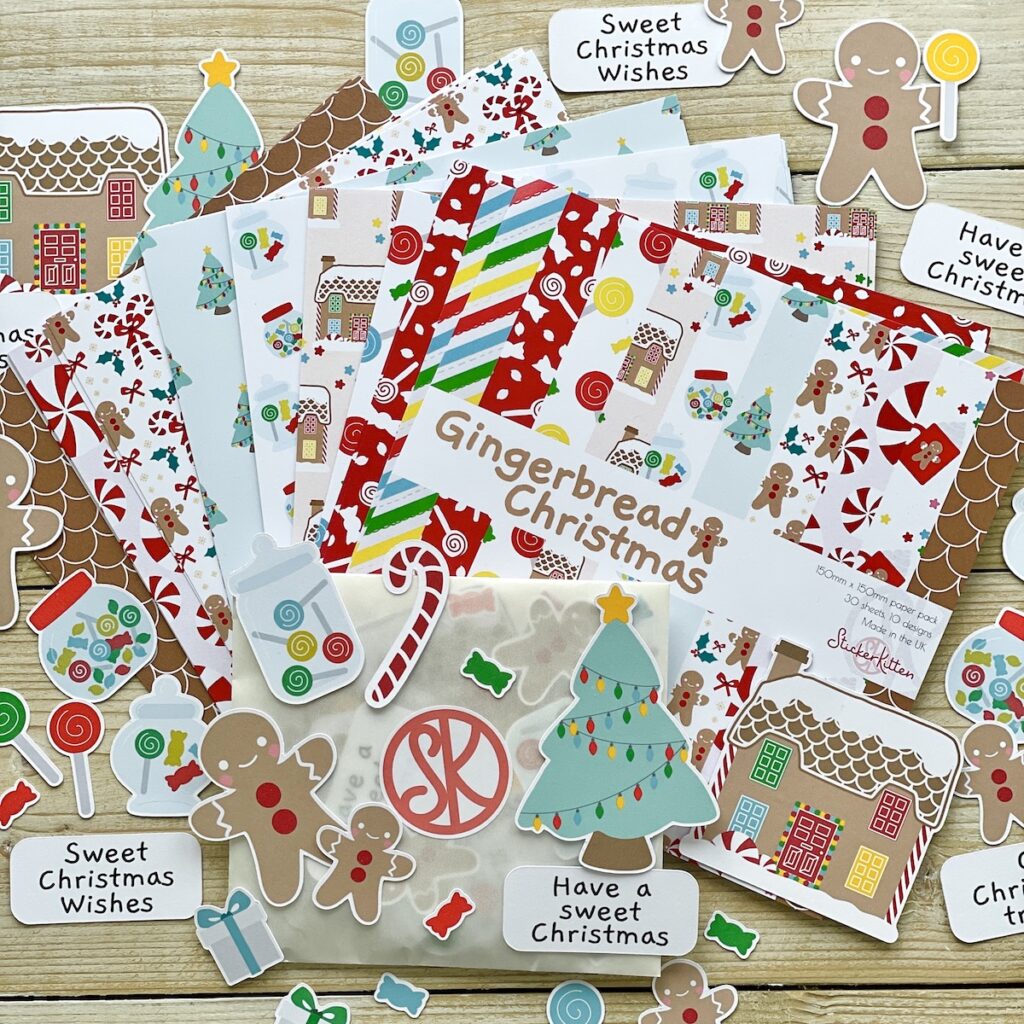
Gingerbread Christmas papers and ephemera
The Gingerbread Christmas mini bundle contains:
– 1 x Gingerbread Christmas paper pack (6×6″, 30 sheets, 10 designs)
– 1 x Gingerbread Christmas ephemera pack (46 pieces)
If you love bright, colourful and super cute craft supplies, this is the bundle for you! Cosy up for your festive crafting with this gorgeous collection of goodies, all designed and illustrated by StickerKitten and made in the UK. Our paper packs use Carbon Captured, FSC-certified paper, and all our packaging is recyclable or biodegradable!
Our ephemera packs (cardmaking toppers) are printed and cut by us using thick and sturdy cardstock and come packaged in a pretty and eco-friendly glassine bag.
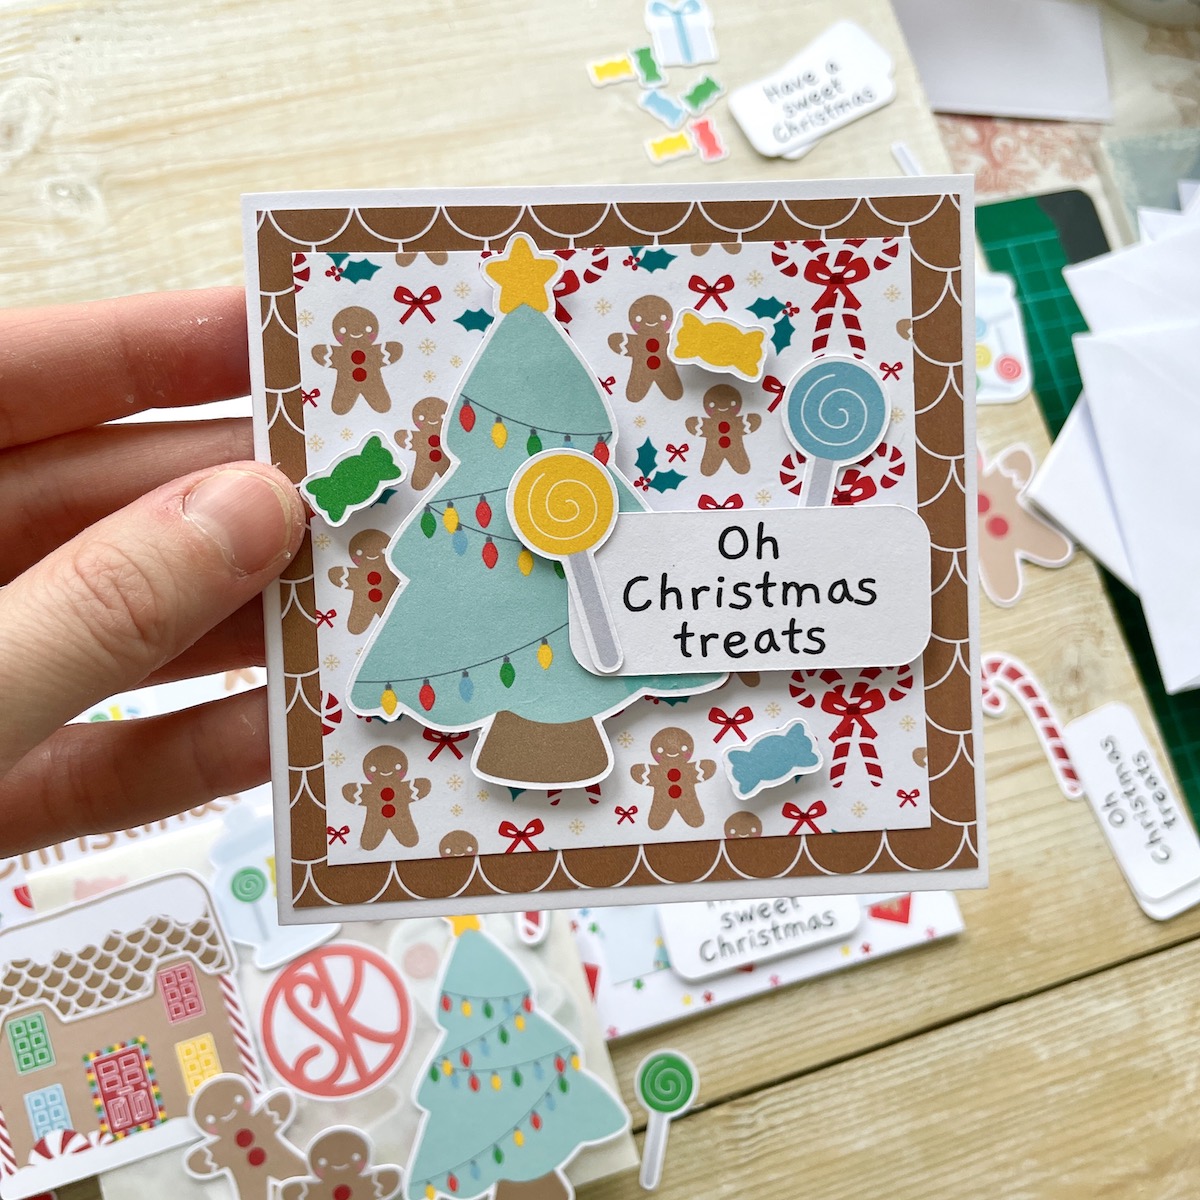
Oh Christmas treats card
It’s super quick to make mini 4×4 cards with the Gingerbread Christmas Card Making Kit.
HOW TO MAKE
1. Use the card blank as a template to draw round on the back of the gingerbread tile paper. Trim a little smaller than your pencil line to create a panel to fit the front of the card blank, leaving a white border.
2. Use the gingerbread tile panel as a template to draw round for the gingerbread man and candy cane patterned paper, again trimming about a centimetre smaller to leave a half-centimetre border.
3. Adhere the panels to the card and attach the Christmas tree ephemera piece using adhesive foam pads.
4. Attach the sentiment by gluing the left hand side and using a foam pad on the right hand side so it sits on top of the tree.
5. Finish by adding the lollipops and sweets.
To see more of this kit, check out my latest YouTube video on quick and easy Christmas cards.

Gingerbread Christmas card making kit
Our Gingerbread Christmas Card Making Kit contains a full paper pack and ephemera pack just like the mini bundle above, but it also comes with card blanks, envelopes and adhesive foam pads so you’ve got everything you need all in one kit to jump into crafting right away!
One of my favourite tips for quick Christmas cards is to use the card blank itself as a template to draw round to get the patterned paper the right size.
My second tip is to vary how you attach the ephemera toppers – use glue for some and use adhesive foam pads for others. This quickly adds interest and lets you layer the designs.
The ephemera pack contains a mix of large toppers, sentiments and small embellishment pieces like sweets and lollipops so it’s super easy to build up a complete design on your card.
If you’d like to see more in this range check out the full Gingerbread Christmas range here. Happy crafting!
Sarah x